25 May 2020
Cleaning your non-slip flooring
Floor cleaning guides.
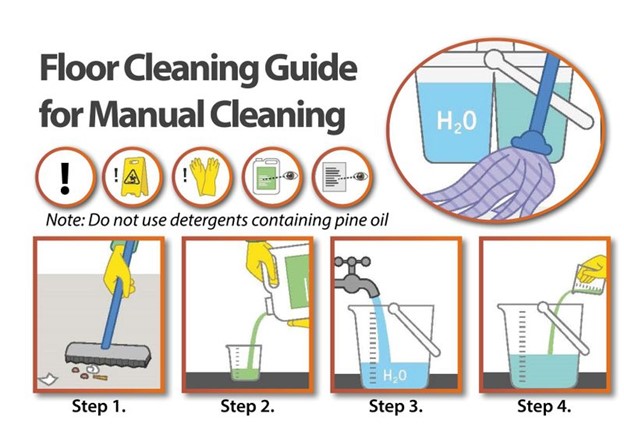

Manual Cleaning:
Step 1: Sweep and/or vacuum dust and other debris.
Step 2-5: Apply an approved detergent, diluted to manufacturer’s recommendations. Leave on floor for approximately 5 minutes.
Step 6-7: If required, scrub with deck scrubber. Wet vacuum or mop residue.
Step 8: Thoroughly rinse with warm, clean water to ensure that the surface PH on the flooring is neutral (PH7).
Step 9: Allow to dry.
Step 10: Rinse cleaning gear well.
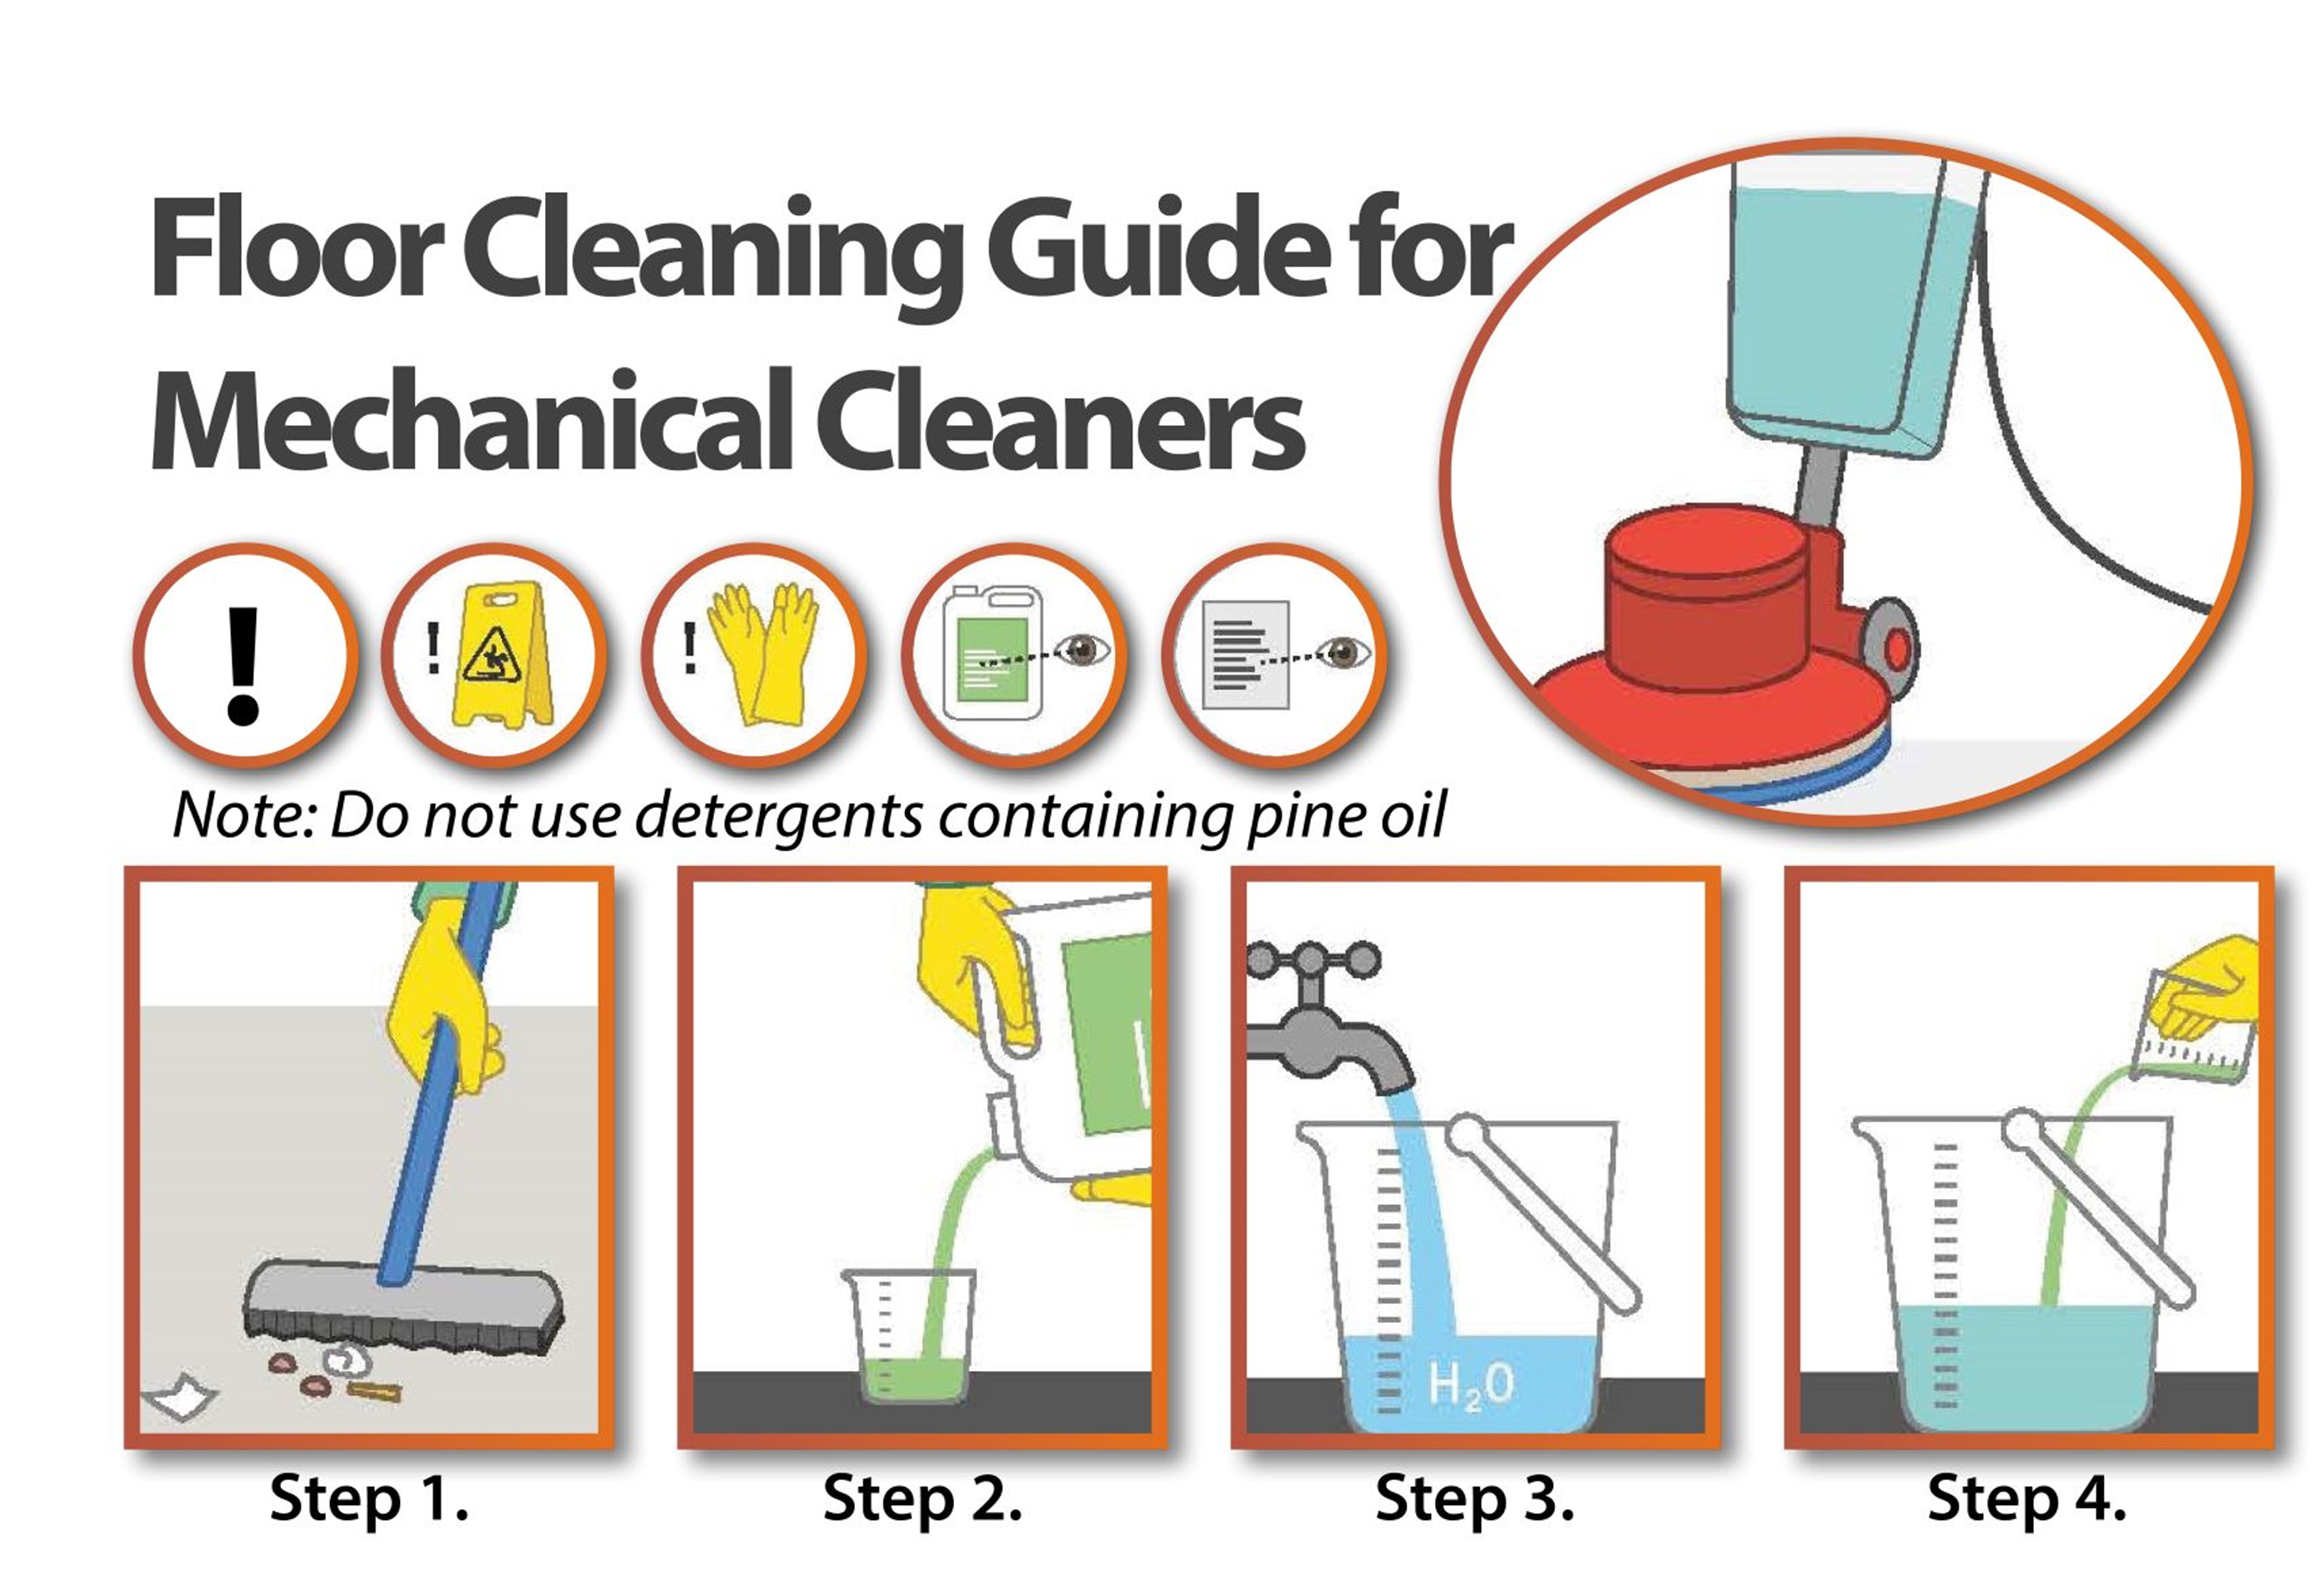
Mechanical Cleaning:
Step 1: Sweep and/or vacuum dust and other debris.
Step 2-5: Apply an approved detergent, diluted to manufacturer’s recommendations. Leave on floor for approximately 5 minutes. (Preferably using a mop & bucket).
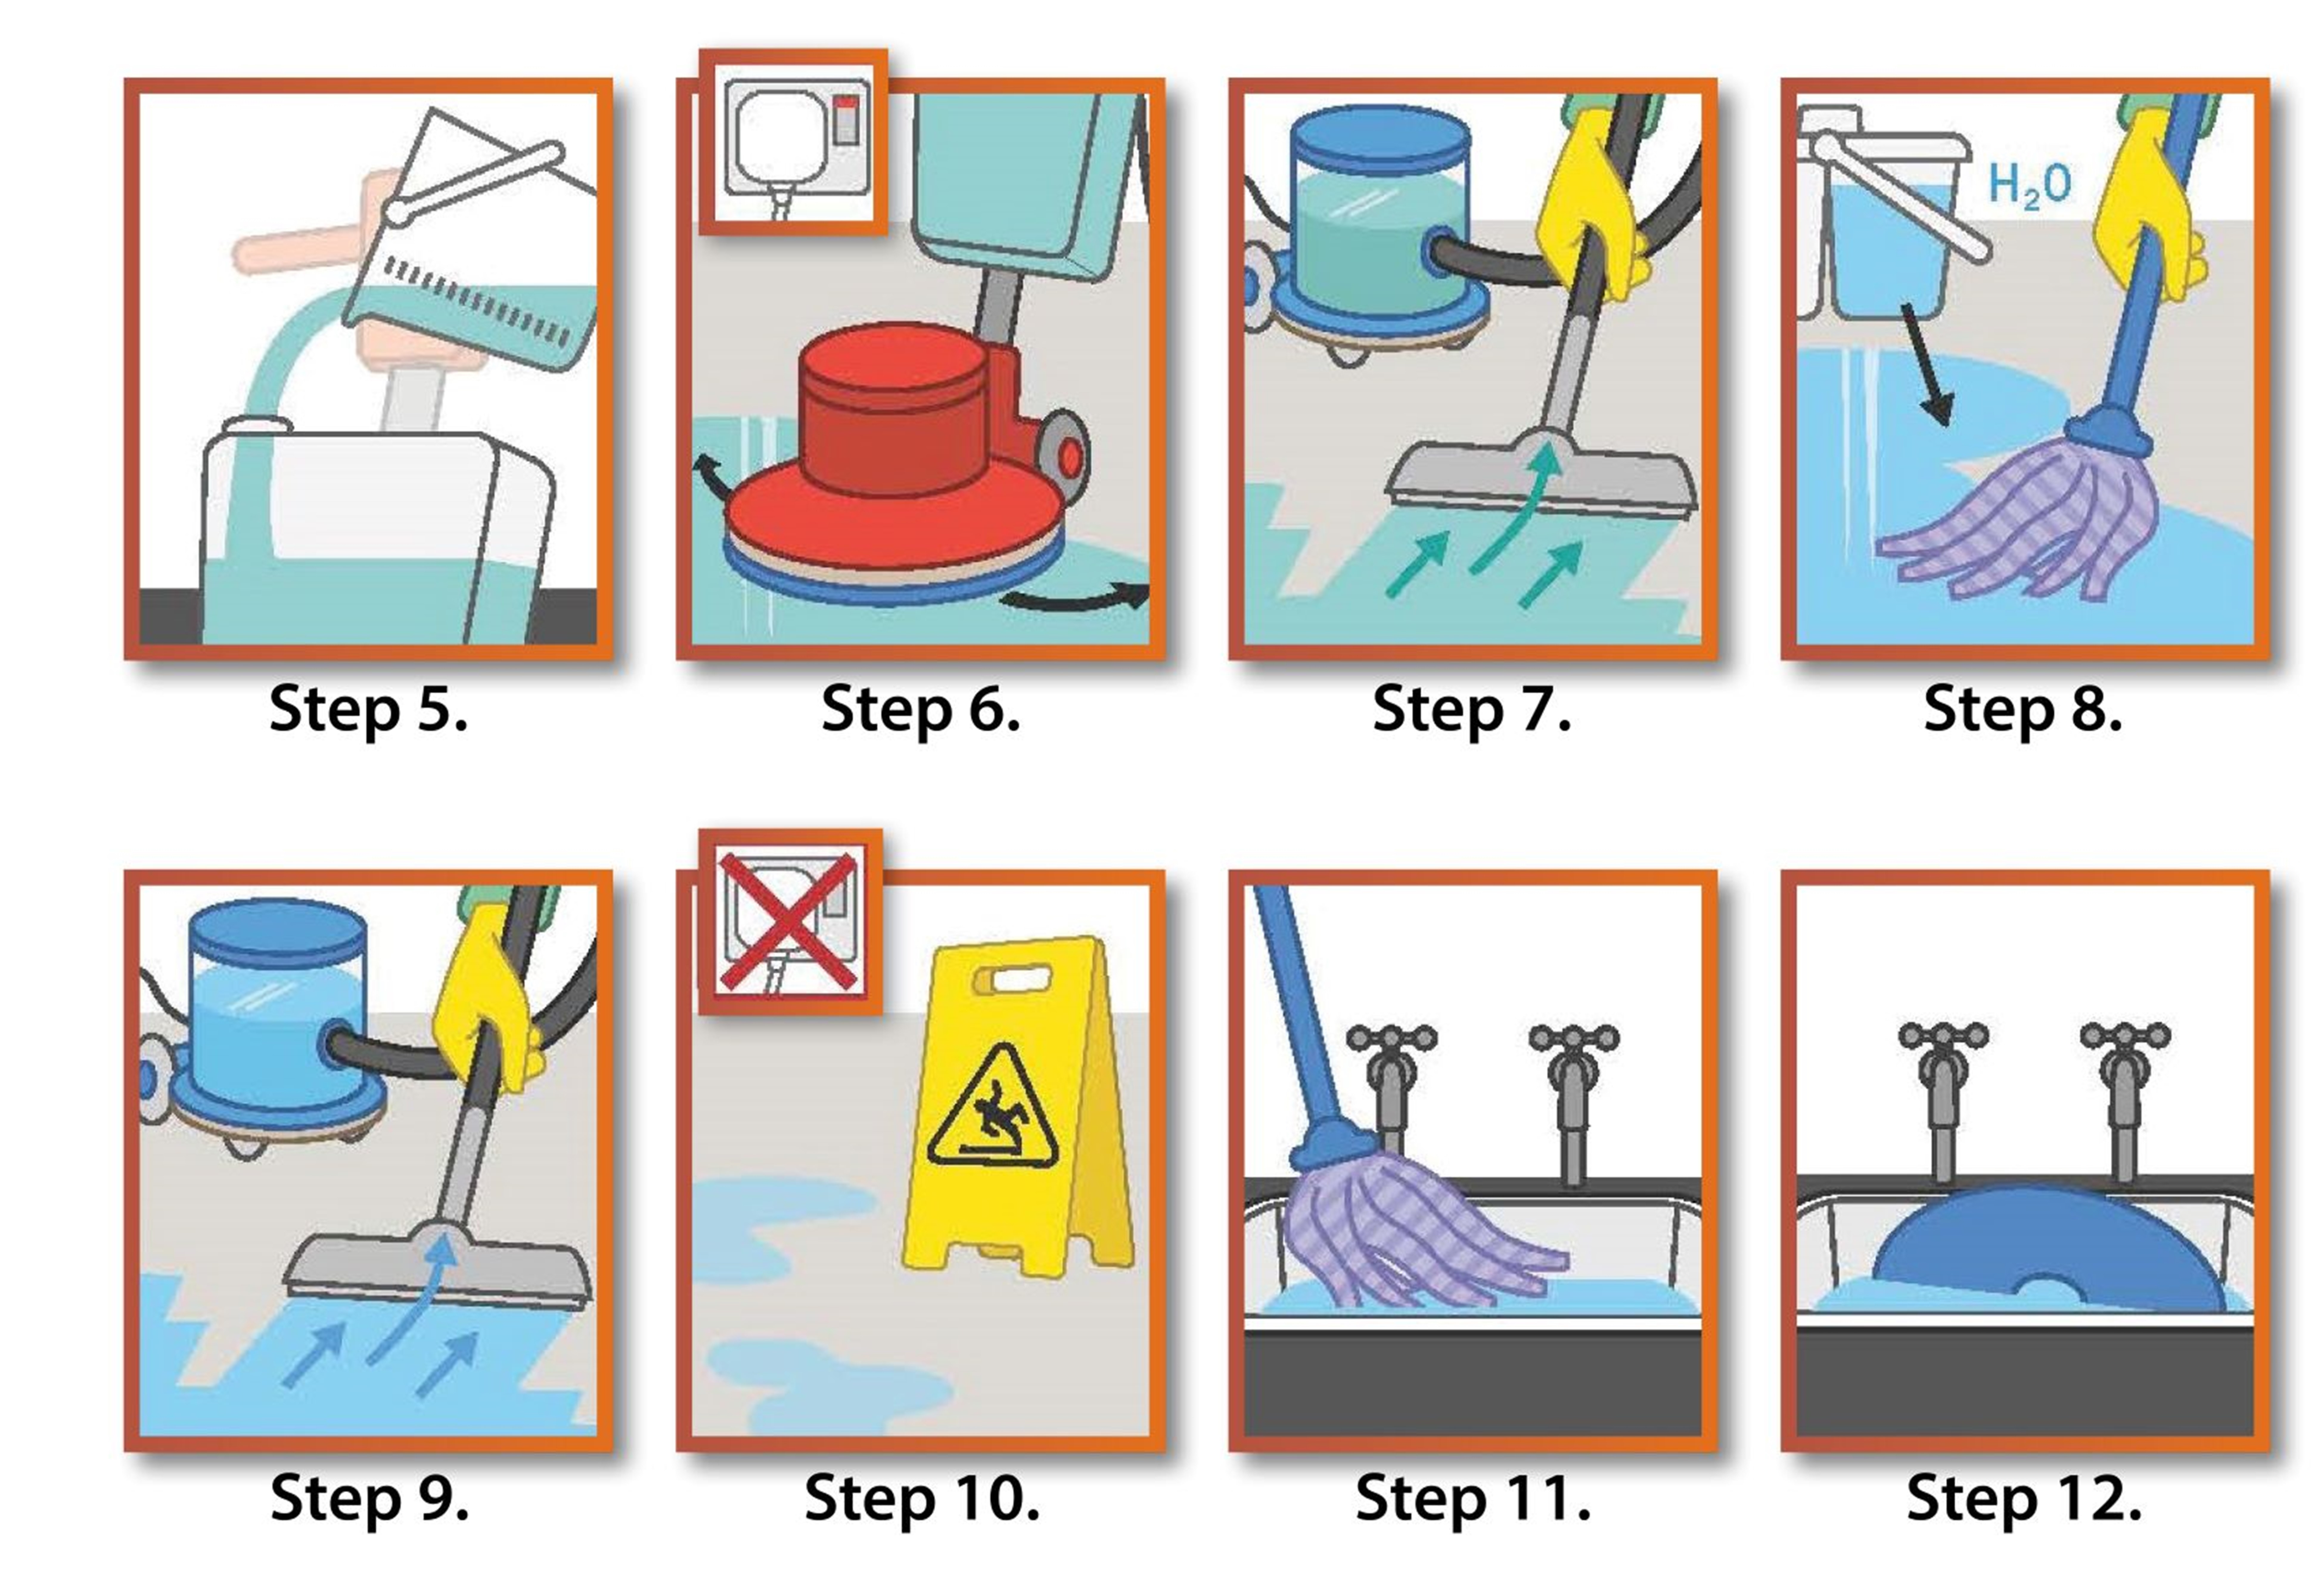
Step 6: If required, machine scurb using synthetic brushes and/or blue pads.
Step 7: Wet vacuum residue.
Step 8: Thoroughly rinse with warm, clean water to ensure that the surface PH on the flooring is neutral (PH7).
Step 9-10: Wet vacuum, allow to dry.
Step 11-12: Rinse cleaning gear well.
Further Precautions & Helpful Hints
- Do not mix detergents.
- Wipe up spills immediately and ensure all oil or grease is removed before you start.
- Use only approved detergents that do not contain pine oil, and have a PH between 7.5 & 10.
- Use only the concentrations recommended by the manufacturer.
- If sudding occurs, add a dash of white vinegar to neutralise.
- When scrubbing using nylon brushes or blue pads for safety flooring.
- When rinsing use warm, clean water and clean equipment, replacing water regularly and always use twin compartment buckets fitted with a ringer.
- Remove any rubber heel marks with a nylon brush and recommended detergent.
- Use quality equipment and machines whenever possible.
- Dirty equipment, particularly mops do not clean - they simply redistribute the dirt.
- New black rubber fittings may cause brown discolouration - particularly on new floors in strong sunlight. Such fittings can be lacquered to prevent discolouration